A St. George Homeowner’s Guide to Garage Door Remote Programming
By Seth | Published: | Updated:
Categories: St. George
Tags: southern utah, st george

In the scenic setting of St. George, Utah, where the red rocks meet suburban charm, homeowners often find themselves needing a reliable guide when it comes to garage door remote programming. Whether you’re a DIY enthusiast eager to master the art of LiftMaster remote programming or a busy homeowner seeking clarity amidst technical confusion, understanding how to program your LiftMaster remote can transform a mundane task into a seamless experience.
With this comprehensive LiftMaster programming guide, we aim to eliminate the guesswork and empower you with the confidence to tackle your garage door remote programming needs. From step-by-step instructions to troubleshoot common issues, this guide is your trusted companion in achieving garage door remote mastery, ensuring your home remains a sanctuary of convenience and security.
- Understanding Your LiftMaster Remote
- Preparing for Programming
- Step-by-Step Programming Guide
- Advanced Tips and Tricks
- When to Call a Professional
- Identifying Complex Issues
- Benefits of Professional Assistance
- Finding Trusted Services in St. George
Understanding Your LiftMaster Remote
Before diving into the programming process, it’s crucial to familiarize yourself with your LiftMaster remote. This section will provide an overview of LiftMaster remotes, explain key features, and address common confusions.
Overview of LiftMaster Remotes
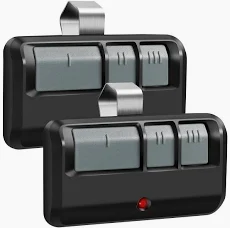
LiftMaster remotes are designed to provide convenient access to your garage door. These devices come in various models, each with unique features tailored to different needs.
The most common types include single-button, multi-button, and keychain remotes. Single-button remotes are straightforward, ideal for operating a single garage door. Multi-button remotes can control multiple doors or devices, offering versatility for homeowners with complex setups.

Keychain remotes, as the name suggests, are compact and portable, perfect for those who prefer to keep their remote with their keys. Each type uses radio frequency technology to communicate with your garage door opener, ensuring reliable operation.
Key Features Explained
LiftMaster remotes boast several key features that enhance their functionality and user experience. Understanding these can help you make the most of your device.
One notable feature is the rolling code technology, which generates a new code each time the remote is used, significantly enhancing security. This prevents potential intruders from intercepting and duplicating your remote’s signal.
Many models also include multi-frequency technology, allowing the remote to operate on different frequencies. This feature helps reduce interference from other devices and improves overall reliability.
Some advanced models even offer smartphone compatibility, allowing you to control your garage door through a mobile app.
Common Confusions and Misconceptions
Despite their user-friendly design, LiftMaster remotes can sometimes be a source of confusion for homeowners. Let’s address some common misconceptions to clear the air.
One frequent misunderstanding is that all LiftMaster remotes are universally compatible with all LiftMaster openers. In reality, compatibility depends on the specific model and year of both the remote and the opener.
Another misconception is that remotes never need maintenance. While they are durable, remotes do require occasional battery replacement and can benefit from proper care to ensure longevity.
Lastly, some users believe that programming a remote is a complex process requiring professional help. In most cases, however, programming can be done easily at home with the right instructions.
Preparing for Programming
Before you begin programming your LiftMaster remote, it’s essential to properly prepare. This section will guide you through the necessary tools, safety precautions, and workspace setup.
Necessary Tools and Equipment
To successfully program your LiftMaster remote, you’ll need a few basic tools and items at hand. Being prepared will make the process smoother and more efficient.
First and foremost, you’ll need your LiftMaster remote and the garage door opener unit. Ensure you have fresh batteries for the remote to avoid any power-related issues during programming.
A ladder may be necessary to reach the opener unit if it’s mounted high on your garage ceiling. For safety, make sure it’s sturdy and placed on level ground.
It’s also helpful to have the owner’s manual for both your remote and opener nearby. These contain model-specific instructions that can be invaluable during the programming process.
Safety Precautions to Consider
Safety should always be a priority when working with any electrical device or moving parts. Take these precautions to ensure a safe programming experience.
- Ensure the area around the garage door is clear of people and objects before testing the remote.
- If using a ladder, follow proper safety guidelines: maintain three points of contact and never stand on the top rung.
- Be cautious of pinch points on the garage door and opener mechanism.
Remember, the garage door is a heavy object. Never attempt to manually lift or lower it without proper knowledge and assistance. If you encounter any issues that seem beyond your expertise, don’t hesitate to contact a professional.
Setting Up Your Workspace
Creating an organized workspace can significantly improve your programming experience. A well-prepared area allows for better focus and easier access to necessary tools.
Choose a well-lit area near your garage door opener. If natural light is limited, consider using a portable work light to illuminate the opener unit and remote clearly.
Set up a small table or workbench nearby to hold your tools, manual, and any notes you might need. This keeps everything within easy reach and reduces the need for frequent trips up and down the ladder.
Lastly, ensure your workspace is free from clutter and potential tripping hazards. A clean, organized area not only enhances safety but also contributes to a more efficient programming process.
Step-by-Step Programming Guide
Now that you’re prepared, let’s walk through the process of programming your LiftMaster remote. This section provides a detailed guide for setup, syncing, and troubleshooting.
Initial Setup and Configuration
The initial setup of your LiftMaster remote is crucial for ensuring smooth operation. This process may vary slightly depending on your specific model, but the general steps remain consistent.
Start by locating the “Learn” button on your garage door opener. This button is typically found on the back or side of the unit and may be labeled as “Smart,” “Program,” or “Set.” The color of this button can vary based on the model.
Next, press and release the “Learn” button. You should see an indicator light activate, signaling that the opener is ready to receive a new code. This light usually stays on for about 30 seconds, giving you time for the next step.
Within those 30 seconds, press and hold the button on your LiftMaster remote that you want to program. Hold it until the opener’s lights blink or you hear a click, indicating successful programming.
Syncing with Garage Door Opener
Once the initial setup is complete, it’s time to sync your remote with the garage door opener. This process ensures that your remote communicates effectively with the opener.
To begin syncing, stand near your garage door opener unit. Press the programmed button on your remote. If the sync is successful, you should see the garage door move in response.
If the door doesn’t respond, you may need to repeat the programming process. Sometimes, interference or timing issues can prevent successful syncing on the first try. Don’t get discouraged; it’s common to need a couple of attempts.
For multi-button remotes, repeat this process for each button you want to program, associating each with a different door or function as needed.
Testing and Troubleshooting
After programming and syncing, it’s crucial to thoroughly test your LiftMaster remote to ensure it’s working correctly. This step helps identify and resolve any issues before relying on the remote for daily use.
Start by testing the remote from various distances and angles within your garage. The remote should consistently activate the door from different positions. If you notice any dead spots or inconsistencies, it might indicate interference or a weak signal.
Next, test the remote from outside your garage. Stand at the end of your driveway and activate the remote. It should reliably open and close the door from this distance.
If you encounter any issues during testing, consult the troubleshooting section of your remote’s manual. Common problems include weak batteries, interference from nearby electronics, or misalignment of the garage door sensors.
Advanced Tips and Tricks
For those looking to optimize their LiftMaster remote experience, this section offers advanced techniques for enhancing performance, dealing with interference, and maintaining your device.
Enhancing Remote Range
Maximizing the range of your LiftMaster remote can greatly improve its convenience and functionality. Here are some tips to boost your remote’s range:
- Replace the battery regularly. A fresh battery often provides better signal strength.
- Clean the remote’s contacts. Dirt or corrosion can weaken the signal.
- Check for and remove potential sources of interference near your garage door opener.
In some cases, you might consider upgrading to a newer model with better range capabilities. LiftMaster continually improves their technology, and newer models often offer superior range and performance.
Remember, while these tips can help, there are physical limitations to radio frequency signals. If you’re consistently having range issues, it might be worth consulting with a professional.
Dealing with Interference Issues
Interference can significantly impact your LiftMaster remote’s performance. Understanding and addressing these issues can restore your remote’s reliability.
Common sources of interference include:
- Other electronic devices operating on similar frequencies
- Metal objects near the garage door opener
- Thick walls or other physical obstructions
To mitigate interference:
- Move other wireless devices away from your garage door opener
- Ensure the opener’s antenna is hanging down and not obstructed
- Consider installing a signal booster if interference is a persistent issue
If you’ve tried these solutions and still experience problems, your area might have unique interference challenges. In such cases, professional assessment can help identify and resolve the issue.
Maintenance and Battery Replacement
Regular maintenance of your LiftMaster remote ensures its longevity and reliable operation. Here’s a simple maintenance routine to keep your remote in top condition:
- Clean the remote regularly with a slightly damp cloth to remove dirt and grime.
- Check the battery compartment for any signs of corrosion.
- Replace the battery every 12-18 months, or sooner if you notice decreased performance.
When replacing the battery, use the type specified in your remote’s manual. Most LiftMaster remotes use coin cell batteries, which are readily available at most electronics or hardware stores.
After replacing the battery, always test the remote to ensure it’s still programmed correctly. In rare cases, a battery change might require reprogramming the remote.
When to Call a Professional
While many LiftMaster remote issues can be resolved at home, there are situations where professional help is necessary. This section will help you identify these scenarios and guide you in finding reliable assistance.
Identifying Complex Issues
Some problems with your LiftMaster remote or garage door system may be too complex for DIY solutions. It’s important to recognize these situations to avoid potential safety hazards or further damage.
Signs that indicate a need for professional intervention include:
- Persistent remote malfunctions despite troubleshooting
- Unusual noises from the garage door opener when using the remote
- The door reversing direction unexpectedly when activated by the remote
- Visible damage to the remote or opener components
If you encounter any of these issues, or if you’re uncomfortable with any aspect of remote programming or garage door operation, it’s best to seek expert help.
Remember, garage door systems involve heavy, moving parts and electrical components. Mishandling these can lead to serious injuries or property damage.
Benefits of Professional Assistance
Opting for professional help with your LiftMaster remote and garage door system offers several advantages:
- Expertise: Professionals have in-depth knowledge of various LiftMaster models and can quickly diagnose and resolve issues.
- Safety: Trained technicians follow strict safety protocols, minimizing the risk of accidents.
- Efficiency: What might take hours for a homeowner to troubleshoot can often be resolved quickly by a professional.
- Comprehensive service: Technicians can assess your entire garage door system, potentially catching and preventing future issues.
Moreover, professional service often comes with warranties, providing peace of mind and potential cost savings in the long run.
Finding Trusted Services in St. George
When seeking professional help for your LiftMaster remote in St. George, it’s crucial to choose a reputable service provider. Here are some tips to find trusted professionals:
- Check online reviews and ratings from previous customers
- Ask for recommendations from friends, family, or neighbors
- Verify that the service provider is licensed and insured
- Inquire about their experience with LiftMaster products specifically
Local hardware stores or garage door retailers may also be able to recommend reliable service providers in the St. George area.
Remember to get multiple quotes before deciding, and don’t hesitate to ask questions about their experience, process, and warranty options. A trustworthy professional will be happy to address your concerns and provide clear, honest answers.